
How to Customize Your Gallery Caption Style
Want your Squarespace gallery captions to look a little less default and a lot more you? In this video tutorial, I’ll show you exactly how to style gallery captions with custom CSS—font styles, spacing, backgrounds, and more.
Whether you want bold, center-aligned captions or a subtle design tweak that still looks pro, this tutorial will give you the tools (and code!) you need. Check out the video below and when you’re ready, keep scrolling for some creative codes you can use.
Important update: Squarespace made changes to the program menu in May 2025. If your menu looks different than the video, press the / key to open the program search and search for Custom CSS to navigate there directly.
Where to Find and Edit Gallery Captions
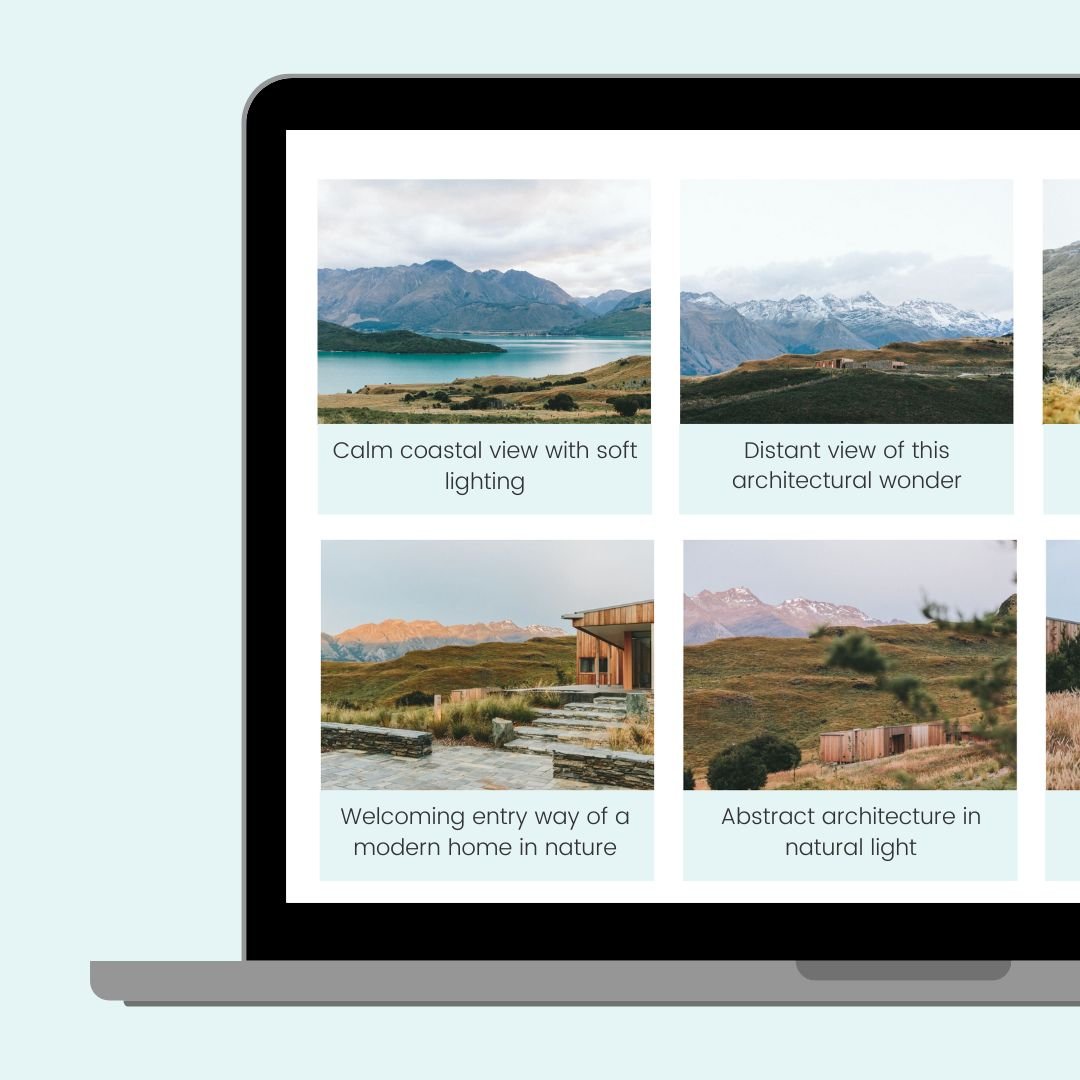
To begin, head into Edit Mode on your Squarespace site. Add a section from the Images category, and look for the one with the little gallery icon—that’s your official gallery section!
Once you’ve added it, click Edit Gallery, and in each image’s settings you’ll see a field for “Description.” That’s where your caption goes. If you want that caption to show up on your live site, make sure the Caption toggle is turned ON in the section editor.
Add Your Custom CSS
Next, go to Website > Website Tools > Custom CSS. This is where the magic happens ✨
This code targest your caption text, changing the style. Let’s break it down:
font-size: Make your caption text larger or smaller.
font-weight: Add boldness for extra emphasis.
color: Update the color using a HEX code or web safe color name.
text-align: Align your text center, left, or right.
white-space: pre-line: This tells the browser to honor line breaks in your captions (super helpful for longer text!).
✅ Pro tip: If your changes don’t show up right away, add !important to your declarations. This tells Squarespace to listen to your code over its built-in styles.
.gallery-caption p{
  font-size:20px!important;
  font-weight:bold!important;
  color: blue;
  text-align:center;
  white-space:pre-line;
  font-family:serif!important
}
Customize the Caption Container
Now let’s style the box or container that your caption is in. To do this, we’ll remove the p that we had in the code above, and add a background and some space. Here’s what’s happening in this code:
background: Adds color behind your caption.
padding: Gives the text some breathing room inside the box.
width: adjust this to accommodate the padding you added so everything looking great on every screen size (desktop, tablet, mobile).
.gallery-caption {
  background: #e5f5f6;
  padding: 5%;
  width: 90%;
}
That’s a wrap on this tutorial! 🎉 You’ll find all of the CSS snippets above ready to copy and paste. Try them out on your site and experiment with your own style, changing the colors, fonts, and other values. And if you want even more help making your site uniquely yours, don’t forget to check out Custom Codey, my Squarespace code AI, available now at CustomCodey.com